本教程是向大家介绍利用Fireworks制作Vista风格强劲光束过程,教程难度不是很大,介绍的很详细,转发过来,希望的朋友喜欢!
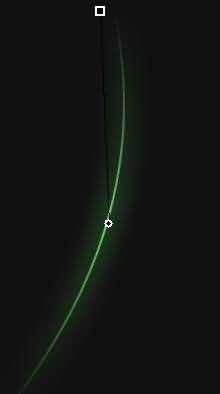
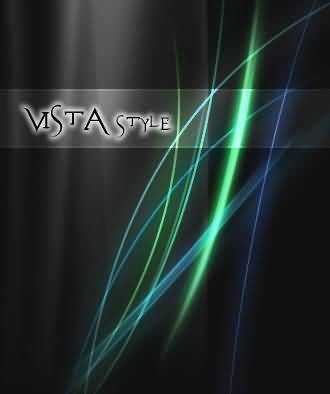
效果图:

首先,我们先制作那些彩色的弧线。
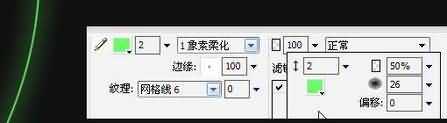
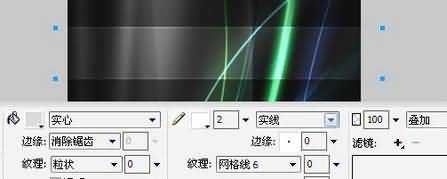
先新建一条绿色的弯曲路径,选择发光滤镜,设置如图:
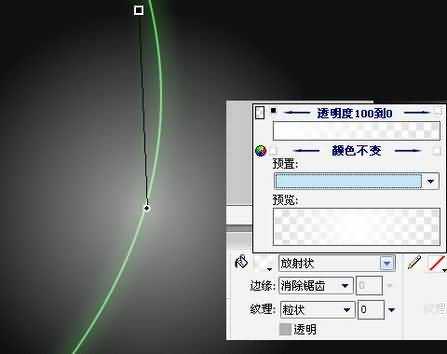
接着,在这个路径上方新建一个白色矩形,选择放射状渐变填充,不要边框,如图:
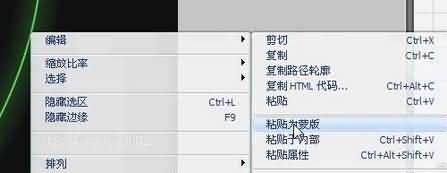
将这个新建的矩形剪切,快捷键是Ctrl+X,然后粘贴为刚才做的那条曲线的蒙板。
将蒙板设置为灰度外观。
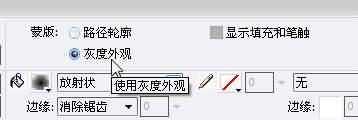
这时,路径就有了首尾渐隐的效果。我们这时还可以调节手柄来调节渐变的细节。
下面这步是影响最终效果细节的操作。
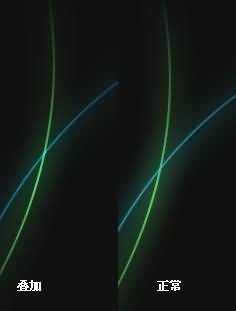
将现在这个带有蒙板的图层复制一个放在该层上方,将图层混合模式设为“叠加”。再把下面那层的透明度进行适当的调节,我设为了50:

得到的结果看起来跟刚才没有太大的区别,别着急,往下看:)

我们按照前面的方法做一条蓝色的曲线光束。与之前那条绿的交叉。这时我把没有添加叠加图层的图放在旁边对比一下,你就能看出来区别了。有叠加图层的交叉部分更“亮”一些,这就是我们需要的细节。
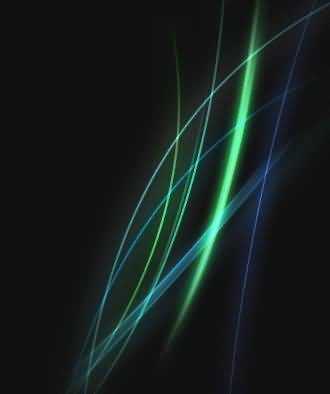
按照这个原理,我们可以再添加一些各种各样的的弧线、路径等,得到这样的效果。至此,彩色弧线部分完工!
然后我们来制作后面那些像透明纱幕一样的背景。
虽然刚才做好的彩色弧线很漂亮,不过我们现在先把他们隐藏起来专心制作下面的部分:
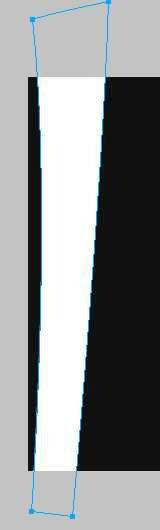
新建一个路径,白色填充,不要边框,如图:
如图,先分成小步:
1.先对这个路径添加内侧阴影滤镜。
2.在滤镜设置里选中“去底色”选项。
3.得到这样的结果。

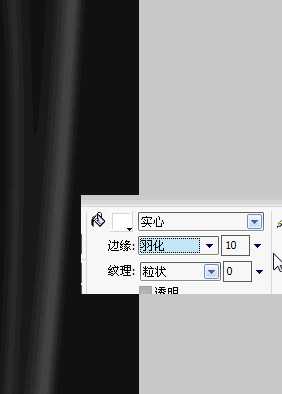
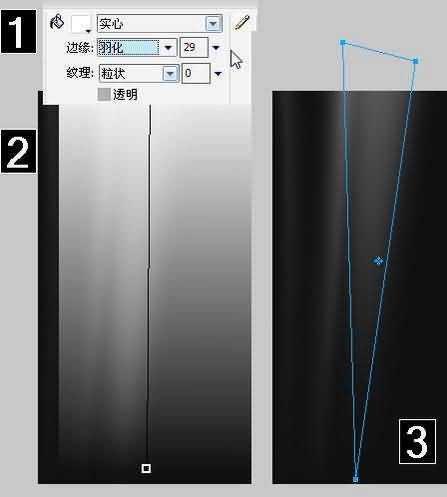
不过边缘太清晰了,我们需要让它更“虚”一点。于是我们把这个路径的边缘设成“羽化”效果,调整羽化大小,我这里设成了10。
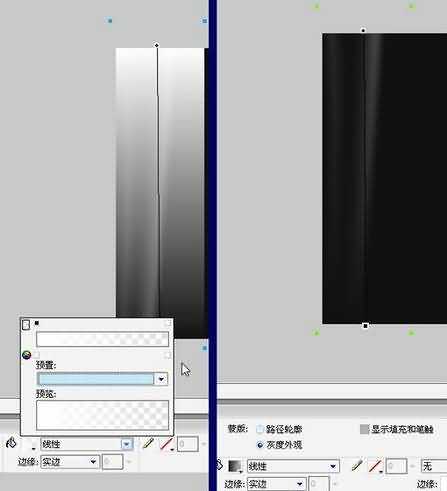
我们发现这条“纱幕”从上到下都是贯通的比较死板,我们来给它加个渐隐效果。按照刚才给弧线添加蒙板的方法,我们给这个路径添加一个蒙板。这次蒙板使用上下线性渐变。
对了刚才忘记说明一点这里补充。添加了发光效果的路径,我们给它添加蒙板的时候需要先Ctrl+G把它和挂载的滤镜效果进行“组合”,或者干脆把它 Ctrl+Shift+Alt+Z进行“平面化”(如果你之后不打算再修改它),否则添加蒙板之后,刚才挂载在弧线上的滤镜效果就会应用于蒙板上了。其他任何挂载过滤镜的图层我们给它添加蒙板的时候最好都先他它进行组合。不知道这算不算是FW的一个bug呢……
好了,我们先把这个羽化后的路径Ctrl+G组合,然后把刚才做的线性渐变填充的路径粘贴为它的蒙板。
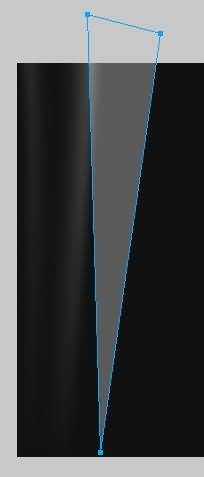
再新建一个三角形路径,白色填充不要边框,透明度设成30,可自行调整。
然后重复刚才的操作,羽化>组合>新建渐变填充路径>粘贴为蒙板
用这种方法完成背景的制作。

再把刚才的弧线显示出来,不错吧:)

再来加个标题。新建一个矩形,这次加上边框。把边框的颜色设置得比填充亮度高一些。
设置矩形的图层混合模式为“叠加”。再加上文字,大功告成!
Fireworks,Vista
免责声明:本站文章均来自网站采集或用户投稿,网站不提供任何软件下载或自行开发的软件! 如有用户或公司发现本站内容信息存在侵权行为,请邮件告知! 858582#qq.com
RTX 5090要首发 性能要翻倍!三星展示GDDR7显存
三星在GTC上展示了专为下一代游戏GPU设计的GDDR7内存。
首次推出的GDDR7内存模块密度为16GB,每个模块容量为2GB。其速度预设为32 Gbps(PAM3),但也可以降至28 Gbps,以提高产量和初始阶段的整体性能和成本效益。
据三星表示,GDDR7内存的能效将提高20%,同时工作电压仅为1.1V,低于标准的1.2V。通过采用更新的封装材料和优化的电路设计,使得在高速运行时的发热量降低,GDDR7的热阻比GDDR6降低了70%。